In this article, I will explain How to create first application in Asp.net MVC.
Step 1: Download and install visual studio community Edition from this link which is free https://www.visualstudio.com/downloads/ .Remember Visual studio is IDE(Integrated development Environment)
Step 2 : Open visual studio and Go to File->New ->Project

Step 3 : Select Web->Asp.net web Application and enter project name and browse project location and hit Ok

Step 4 : Select MVC and Leave uncheck to Add unit tests

Step 5 : Select No Authentication for this first application .we will discuss it later.Hit OK and again hit Ok

Step 6 : Now project will open and structure of our project looks like below

Step 7 : Delete HomeController.cs file because we are creating from scratch.

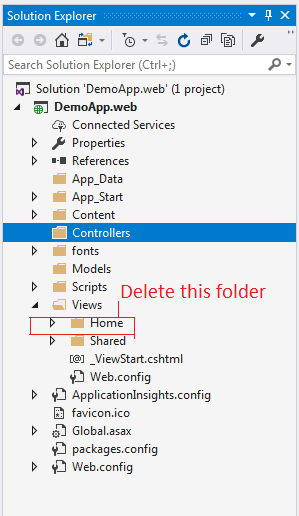
Step 8 : Delete Home folder inside view .Views->Home
Step 9 : Add Controller .For this Right click on Controller folder->Add->Controller

Step 10 : Select MVC5 Controller-Empty

Step 11 : Enter controller name as Home and do not delete the word controller.MVC works on convention so we always write controller name as HomeController. i.e. we append word controller.For now word controller is just like reserve word.Hit Add

Our controller code is shown below . Here Home is controller name and HomeController is class which is inherited from controller base class which is present inside System.Web.Mvc namespace.Inside HomeController class there is Index action method which is always public whose return type is ActionResult(ActionResult is abstract class) . But here we are returning View() which returns ViewResult class.This ViewResult class is inherited from ViewResultBase and finally this ViewResultBase is inherited from ActionResult so ViewResult class is indirectly inheriting from ActionResult abstract class .Return type of action method is not always ViewResult so we make its reutrn type as base class ActionResult which is parent for different action results like JsonResult, PartialViewResult, ContentResult, FileResult etc.

Step 13 : When we run our application it displays following error because we have not created any view yet. View name is same as action method name in mvc and it searches with different file extensions inside folder whose name is same as controller name and finally inside Shared folder.If we want to share our view among different controller's action method ,we should put that view inside Shared folder.Here View is not present inside Home and Shared folder so displays error.

Step 14 : Now add view . Right click anywhere inside curley braces of action method and click add view .Leave view name as it is and view name is same as action method name but you can change the view name according to your choice .If we change the view name we should called explicitly call that view from action method giving its name as parameter to View("view name").Select Empty(without model) template for now and leave blank model class.Tick use layout page for setting common design to child page as well. Here Layout page is same as master page in asp.net webform. and finally hit Add

Step 15 : now Our view looks like below and write <p>Hello World !!!</p> inside view

Step 16 : Routing simplifies the URL. We have to write name as key ,url and defaults controller and action name inside MapRoute method.Here Default is our key,url pattern is controller name /action name/ id (which is optional) . In our case Home is default controller and Index is default action.

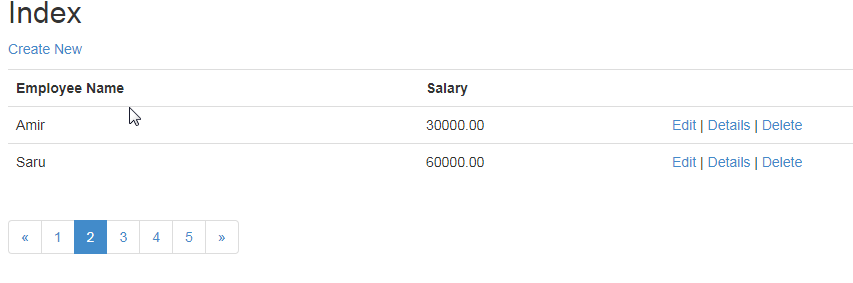
Step 17 : Final output is as shown below .

Step 1: Download and install visual studio community Edition from this link which is free https://www.visualstudio.com/downloads/ .Remember Visual studio is IDE(Integrated development Environment)
Step 2 : Open visual studio and Go to File->New ->Project

Step 3 : Select Web->Asp.net web Application and enter project name and browse project location and hit Ok

Step 4 : Select MVC and Leave uncheck to Add unit tests


Step 6 : Now project will open and structure of our project looks like below


Step 10 : Select MVC5 Controller-Empty

Step 11 : Enter controller name as Home and do not delete the word controller.MVC works on convention so we always write controller name as HomeController. i.e. we append word controller.For now word controller is just like reserve word.Hit Add

Our controller code is shown below . Here Home is controller name and HomeController is class which is inherited from controller base class which is present inside System.Web.Mvc namespace.Inside HomeController class there is Index action method which is always public whose return type is ActionResult(ActionResult is abstract class) . But here we are returning View() which returns ViewResult class.This ViewResult class is inherited from ViewResultBase and finally this ViewResultBase is inherited from ActionResult so ViewResult class is indirectly inheriting from ActionResult abstract class .Return type of action method is not always ViewResult so we make its reutrn type as base class ActionResult which is parent for different action results like JsonResult, PartialViewResult, ContentResult, FileResult etc.
using System;
using System.Collections.Generic;
using System.Linq;
using System.Web;
using System.Web.Mvc;

namespace DemoApp.web.Controllers
{
    public class HomeController : Controller
    {
        // GET: Home
        public ActionResult Index()
        {
            return View();
        }
    }
}
Step 12 : Now Run our application .Debug->Start without debugging

Step 13 : When we run our application it displays following error because we have not created any view yet. View name is same as action method name in mvc and it searches with different file extensions inside folder whose name is same as controller name and finally inside Shared folder.If we want to share our view among different controller's action method ,we should put that view inside Shared folder.Here View is not present inside Home and Shared folder so displays error.

Step 14 : Now add view . Right click anywhere inside curley braces of action method and click add view .Leave view name as it is and view name is same as action method name but you can change the view name according to your choice .If we change the view name we should called explicitly call that view from action method giving its name as parameter to View("view name").Select Empty(without model) template for now and leave blank model class.Tick use layout page for setting common design to child page as well. Here Layout page is same as master page in asp.net webform. and finally hit Add

Step 15 : now Our view looks like below and write <p>Hello World !!!</p> inside view
@{
    ViewBag.Title = "Index";
}

<h2>Index</h2>
<p>Hello World !!!</p>

Step 16 : Routing simplifies the URL. We have to write name as key ,url and defaults controller and action name inside MapRoute method.Here Default is our key,url pattern is controller name /action name/ id (which is optional) . In our case Home is default controller and Index is default action.

Step 17 : Final output is as shown below .